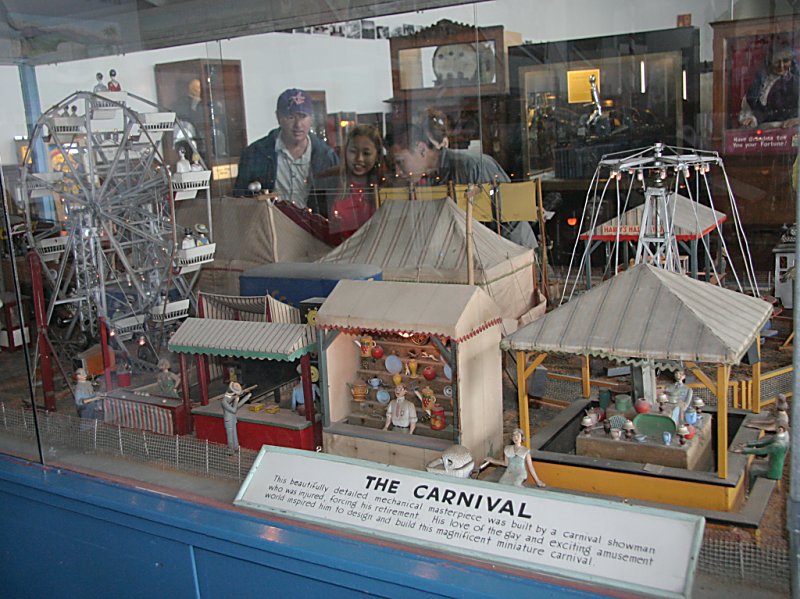
| You can see less than half of
this display here. Read the sign at the bottom. Mary plunked in two quarters to make the lights come on, the Ferris wheel go round, etc. |
 |
San Francisco Get-Away, Day 1 of 3
Fisherman's Wharf, Pier 45
Photos taken June 8, 2005
Posted June16, 2005
© 2005, Herbert E. Lindberg
About a year ago Mary and I signed up for a 3-day package promotional trip to San Francisco. It was hard to refuse two nights at the Sheraton hotel on Fisherman's Wharf, including parking, plus two tickets to a Giants game, all for $200. We plunked down our $200 and then never got around to making arrangements until this Spring. I chose the June 9th game against Kansas City because it was the only afternoon game and we were most interested in seeing the new (to us) Giants stadium (SBC Park -- ugg!) with its beautiful view of the bay in the background.
We drove to SF on Wednesday, June 8th in pouring rain and howling wind and checked into the hotel about 2 p.m. Rain or not, we walked the few blocks to Pier 45 to see some sights. We saw the game the next day (Day 2 of this Web page series) and then wandered Pier 39 on the morning of Day 3 before heading back to Lake Wildwood.
Our first stop after a half-mile walk in the rain with our umbrellas blowing inside out was the museum of mid-century mechanical carnival machines, which houses a vast collection of machines and action displays from defunct places like the Cliff House.
| You can see less than half of
this display here. Read the sign at the bottom. Mary plunked in two quarters to make the lights come on, the Ferris wheel go round, etc. |
|
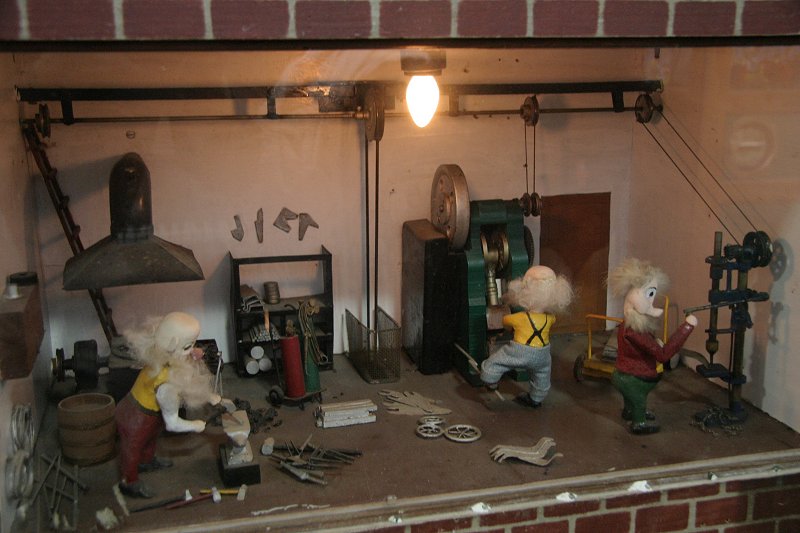
| This is one of six cubicles that made up "Santa Claus Work Shop." |
 |
You can see the complete six-cubical Santa Claus Work Shop in the background of the picture below. The farm in the foreground was the most impressive display in the museum in terms of detail and action.
|
Two more quarters made this mechanical
marvel |
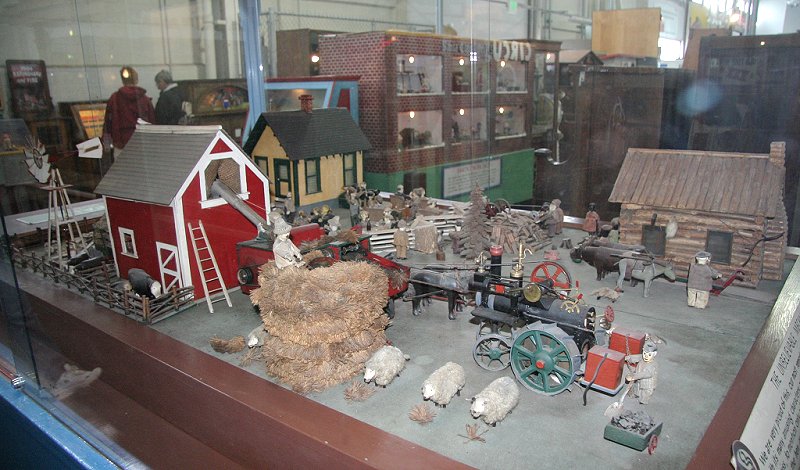 |
| The windmill is now whirling,
the ducks waddling, the chickens pecking, the cows nodding, people moving. |
 |
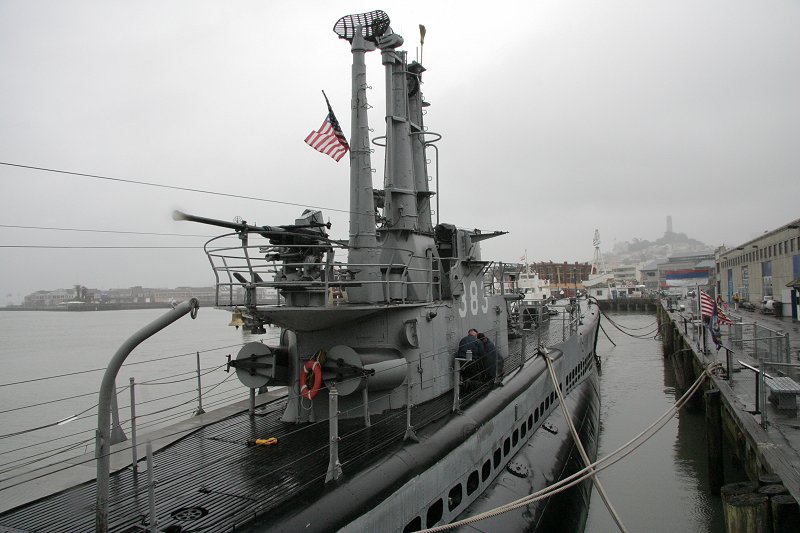
After spending about an hour gaping at all the carnival displays, we ventured back out into the rain and along Pier 45. Moored there was the USS Pampanito, a World War II submarine, launched in 1944 and credited with six sunken Japanese ships, five severely damaged, and 73 Australian POW's rescued after returning to the scene of one of the sinkings. Tickets to tour the sub were half price for seniors, so we got two for $10 and were given little self-tour sound players about the size of a cell phone. When we got on board we found that the dreary, rainy day wasn't so bad after all -- because of the bad weather hardly anyone was on the pier and there were only six other people scattered around the inside of the sub. At each of the 11 stations that the sound player explained what we were seeing, we were the only ones in the room -- it was marvelous! Especially when you consider that Pampanito hosts approximately 110,000 visitors a year and is one of the most popular historic vessels in the country (from their Web page).
|
World War II submarine, with Coit Tower in the rainy background. |
 |
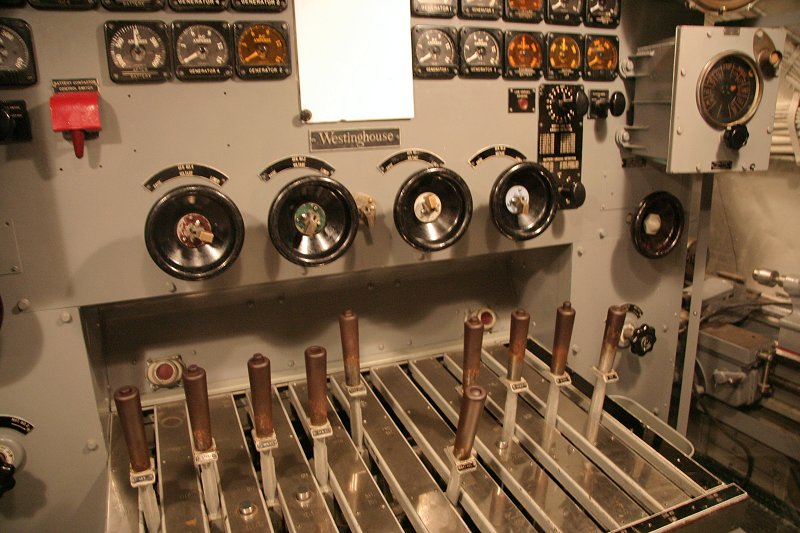
|
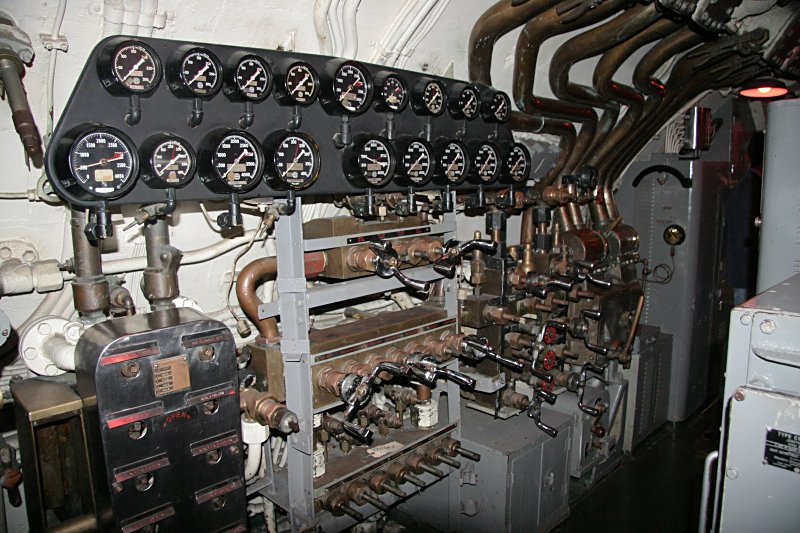
Engine and motor-generator control room,
where the operator distributed diesel power |
 |
| One of four monster diesel
engines. A pair is in this "after engine room" and another in the "forward engine room." When these were running (which was most of the time while at the surface) the sound was deafening. |
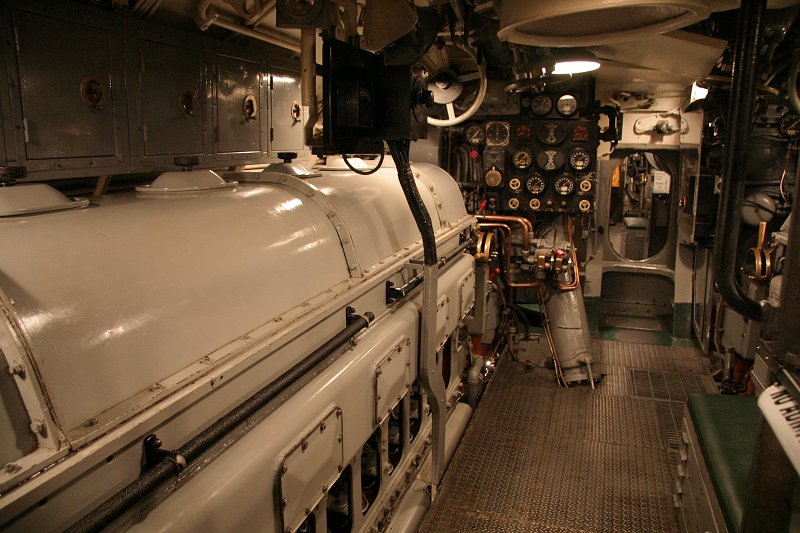 |
While submerged, peak speed was only 9 knots and could be maintained for only an hour. Most travel was therefore done at the surface, where speed with the diesel engines running was about twice as fast. Submerged operation was only to lay in wait for a target, at much reduced speed to conserve battery power. In the picture below I've turned around 180 degrees to face aft. Each of the four engines is a Fairbanks-Morse 10-cylinder opposed piston engine with an output of 1,600 shaft horsepower.
|
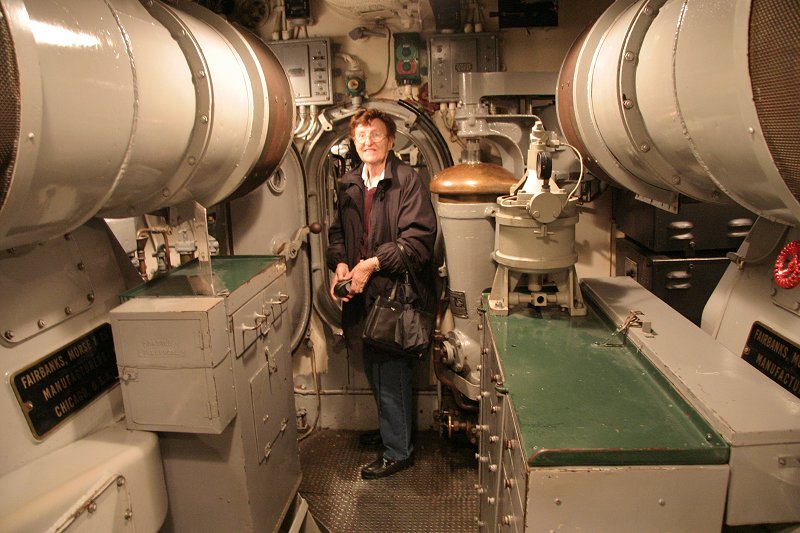
Mary in the "after engine room." |
 |
| This is the dive control station. |
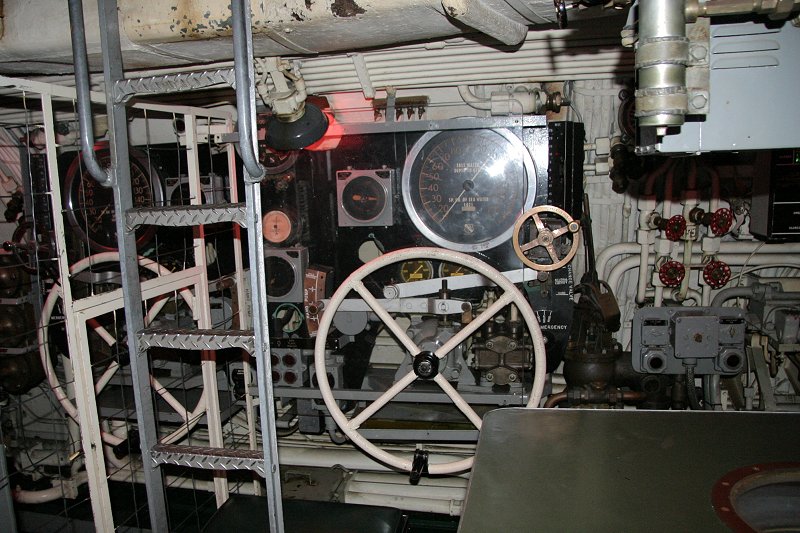 |
The dive control room was a maze of pipes and valves to pump water into and out of the ballast tanks. Valves and pipes are on one side of the room (below) and vane-control wheels and depth gages (above) are on the other side.
| A maze of valves, gages, and pipes to enable dives. |
 |
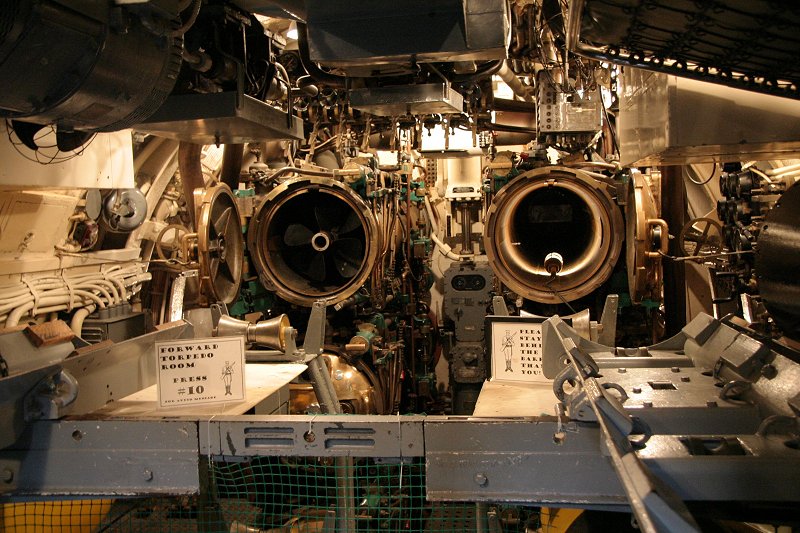
| Two of the six firing tubes in the forward torpedo room. The aft room had four tubes. |
 |
| Close-up of left tube above, to show valves, levers, etc. |
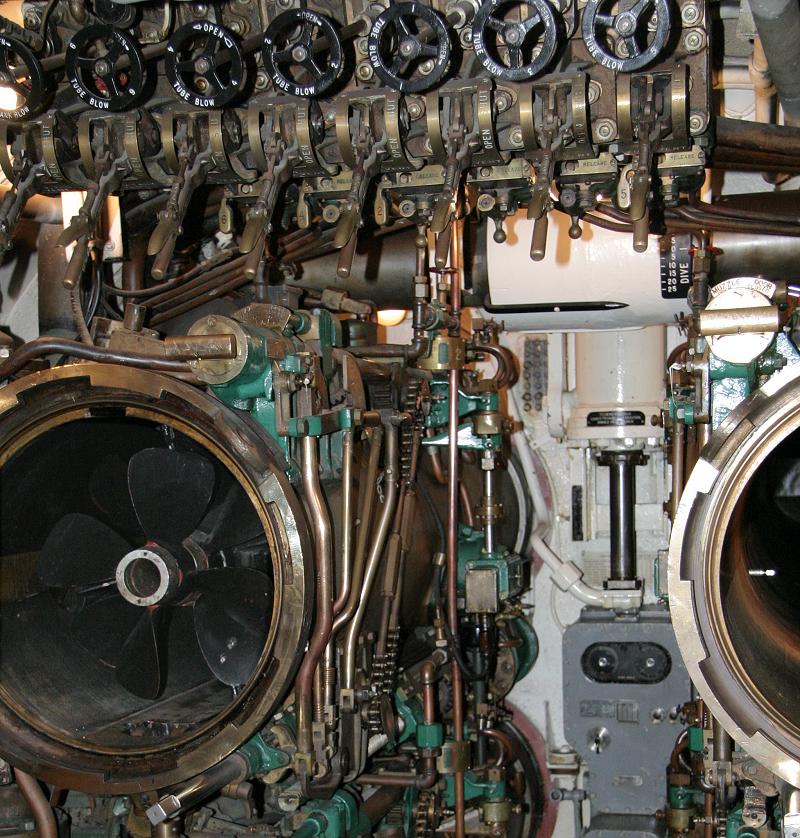 |
P.S. to this page: These submarine pictures would not have been possible without the image-stabilized wide-angle lens on my Canon Rebel digital camera. Many of them were taken with available light (which wasn't much) and an ISO setting of 800, and with the camera fully zoomed out to the wide-angle 17 mm focal length (27 mm equivalent for a full-frame 35-mm camera). For the picture immediately above I zoomed in a bit (to 30 mm) and used flash to get the detail. I also brightened the inside of the torpedo tube during post-processing so you can see the torpedo.